For my purposes, I needed a VPN connection to connect all my sites and my notebook to access them all. I use WireGuard VPN for this solution because it is secure and uses modern cryptography for the connections. I have connected my location in Croatia (Home Lab), where I have several servers, network devices, and virtualization for my testing purposes and for backups of all cell phones and PCs at home. Also, my location in Germany, where I live and work, and my servers, which are located in Germany in one of the data centers of the provider Contabo.
Why I use wireguard?
WireGuard is a free and open-source VPN protocol designed to be lightweight, secure, and efficient. It operates at the network layer, allowing secure communication between different devices over both private and public networks. Unlike traditional VPN protocols, WireGuard leverages modern cryptography, making it simpler to implement while providing strong security.
I have rented a server with a public IP, and on this server, I have installed the WireGuard server. This server is dedicated solely to WireGuard VPN and connections. Some advantages of WireGuard include the ability to connect to any internet connection (WiFi, LAN, Mobile) on my server because I can connect to port 443, which is not blocked on any network where I am connected (hotels, cafes, some restricted guest WiFi networks, HotSpots), allowing me to work without any problems. Below, you can see how I prepared and configured my server for this purpose. I have installed Ubuntu 22.04 with kernel version 5.19 on my server, but you can use any Linux distribution like Debian and others for this purpose. Here, I will provide commands and instructions for Ubuntu and Debian, where I tested this.
Installation Instructions
I’ve created a small script for installing the WireGuard server with a GUI. Below, you’ll find every step for installation with my script.
Step 1:
Download the script to your server:
wget https://github.com/tomeksdev/wireguard-install-with-gui/releases/download/v1.0.0/wg-server-install.tar.gz
This script automatically installs WireGuard and all the needed dependencies for WireGuard configuration and GUI configuration.
Step 2:
Make this script executable and then run it with the following commands:
tar -xzvf wg-server-install.tar.gz
chmod +x wireguard-server-inst.sh
./wireguard-server-inst.sh
Step 3:
Here, my script asks if you want to continue with the installation. If you want to cancel the installation, simply type “no/NO.”

Step 4:
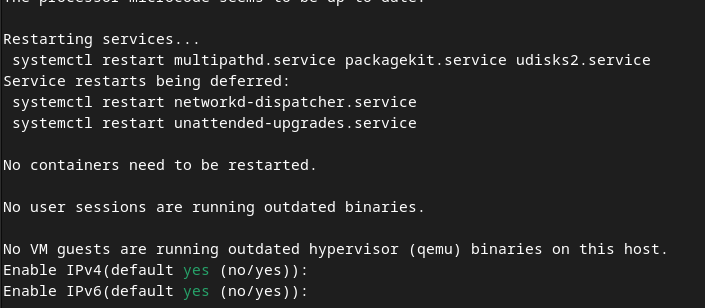
In this step, you have the choice to activate either IPv4 or IPv6 for your WireGuard VPN setup. You can select and activate only one of them, depending on your network configuration and requirements.
Step 5:
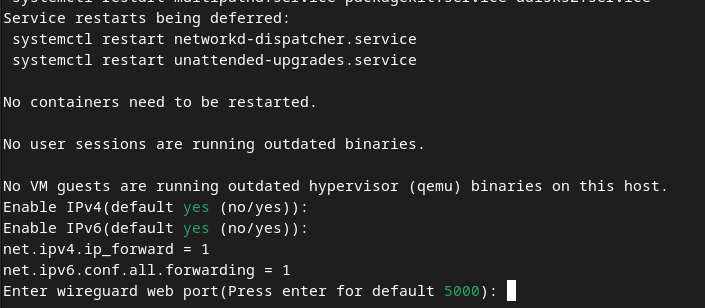
The last thing we need is a port for accessing the WebGUI of WireGuard. The default is 5000, but you can choose any port you prefer.
Setp 6:
Finally, we have finished the installation, and now you can access your Web GUI from WireGuard. Below are instructions on how to configure WireGuard via the WebGUI.

Configuration of WireGuard via WebGUI
You can access your WebGUI using this URL: http://IP_ADDRESS:PORT with the username admin and password admin.

Setp 1:
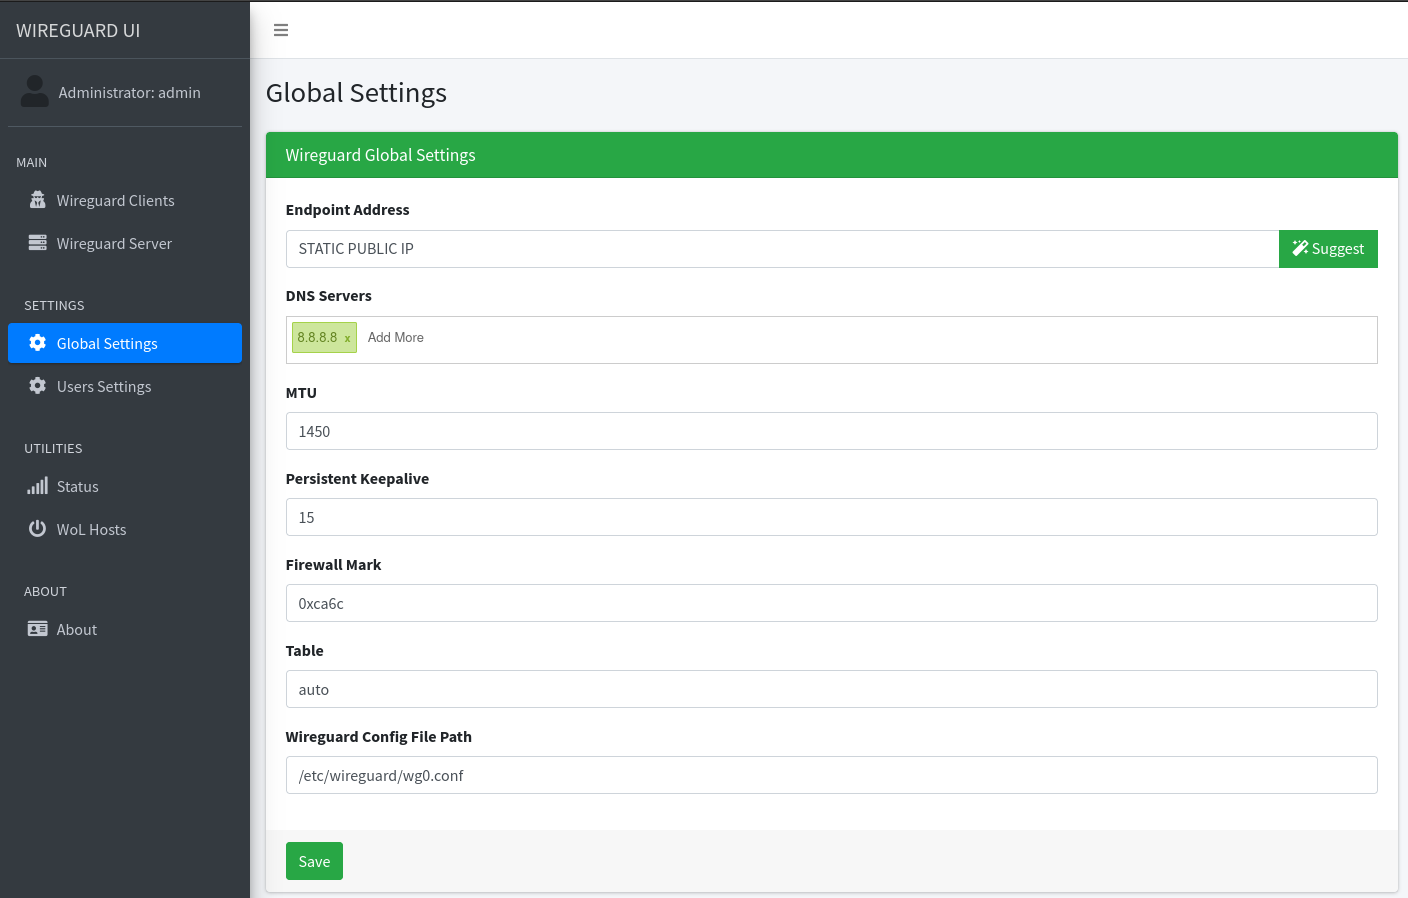
In the first step on WebGUI, we need to configure the WireGuard server in Global Configuration. We need to put a public static IP with which we will connect to other devices and WireGuard client systems. Additionally, I always use the DNS server, which here is set to 8.8.8.8, the public Google DNS. Other settings can be left at their default values for now.
Setp 2:
The second step is to configure the WireGuard network interface. In the “Server Interface addresses” field, we put one private IP address with a subnet for more addresses. This address will be the address of the WireGuard server, and when we connect with a client, we can also ping this address. “Listen Port” is the port used to connect with clients. On my WireGuard server, I’ve set it to 443 because this port is mostly not blocked anywhere, giving me constant VPN access.
“Post Up Script” - The PostUp script you provided is used to configure the iptables firewall rules on a WireGuard VPN server. It allows traffic from the WireGuard tunnel interface to be forwarded and ensures that outgoing traffic is properly masqueraded with the server’s public IP address, enabling proper routing and response handling for the connected clients.
In the “Post Up Script” field, you should input the following code:
iptables -A FORWARD -i %i -j ACCEPT; iptables -t nat -A POSTROUTING -o ens192 -j MASQUERADE
“Post Down Script” - The PostDown script is used to clean up the iptables firewall rules that were set up during the activation of the WireGuard VPN tunnel. It deletes the rules that allowed traffic forwarding from the WireGuard tunnel interface and removed the NAT rule that masqueraded outgoing traffic. This cleanup ensures that the server returns to its previous state after the WireGuard tunnel is deactivated.
In the “Post Down Script” field, you should input the following code:
iptables -D FORWARD -i %i -j ACCEPT; iptables -t nat -D POSTROUTING -o ens192 -j MASQUERADE

Setp 3:
Now, you can add client devices/users to your WireGuard server and establish VPN connections by clicking on “Wireguard Clients.”

Setp 4:
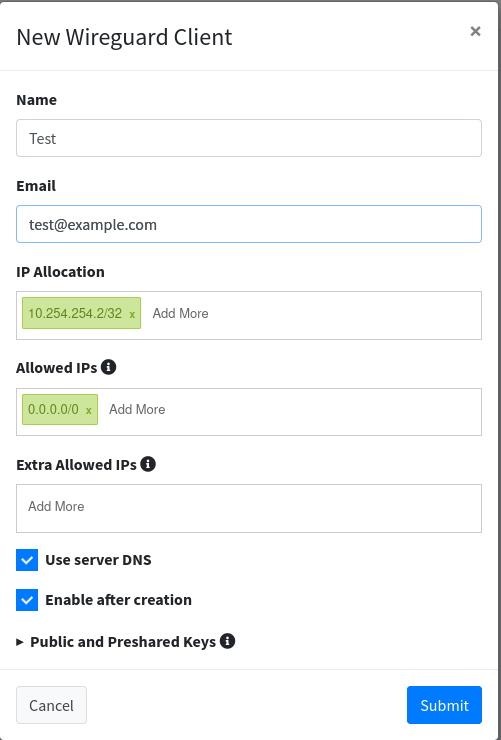
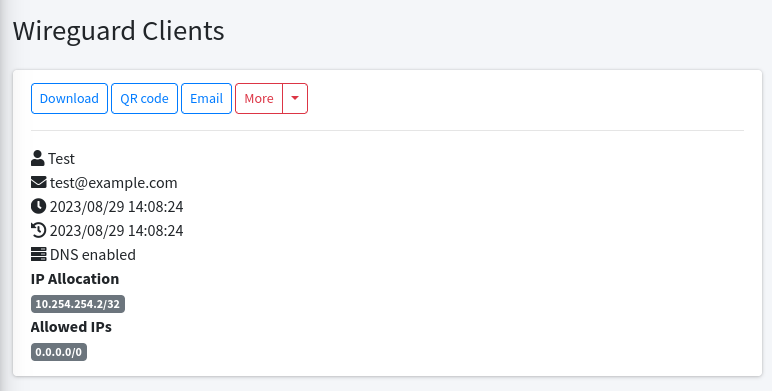
When you click on “+ New Client,” you can configure the client. Here, you can specify your desired name and email address.
- “IP Allocation” will automatically assign the next available IP if others are not in use within the specified range from Step 2.
- “Allowed IPs” defines which host IPs and network range IPs will be included in the client’s WireGuard configuration and to which all clients will have access. I typically avoid using the default IP 0.0.0.0/0 and instead specify the specific networks I need.
- “Extra Allowed IPs” remains empty for most clients like notebooks, PCs, or mobile phones. If you connect a router like Mikrotik, OPNSense, or any router/firewall that supports WireGuard, and you need to allow access from other clients to networks behind these routers/firewalls, you should enter the network you need access to in this field.
Setp 5:
Once you’ve configured the client, you can download the configuration by clicking on “Download” or scan the QR code by clicking on “QR code.” When you apply this configuration to your devices and activate the tunnel, you’ll have a VPN connection to the WireGuard server.
Conclusion
In conclusion, setting up a WireGuard VPN server with a user-friendly web interface simplifies secure connections across multiple sites and devices. WireGuard’s modern and open-source VPN protocol combines simplicity with robust security, offering efficient connections across private and public networks.
The streamlined installation script and WebGUI empower users to quickly establish secure VPN connections. WireGuard’s flexibility to connect via port 443 ensures uninterrupted access across various networks, even in potentially restricted environments.
This implementation, complete with an easy-to-use web interface, enhances online security, making it suitable for personal and professional use. By following the outlined steps, you can confidently deploy WireGuard, improving online privacy and connectivity.
